

In this tutorial we are going to see how we can use the built-in ADC of STM32 Microcontoller with HAL libraries and DMA. We will be comparing the arduino ADC with STM32’s ADC.
Parts Needed
- STM32F103C8T6 – Blue pill board – 1
- 100k Potentiometer – 2
Wiring Diagram

Arduino ADC vs STM32 ADC
Arduino has a 10-bit ADC (0-1023) and STM32 has a 12-bit ADC (0-4095) so STM32 has more resolution and very useful in sensitive analog input application. Arduino works on 5v and stm32 works on 3.3v hence it has more resolution on a lower voltage.
STM32CubeMX Setup
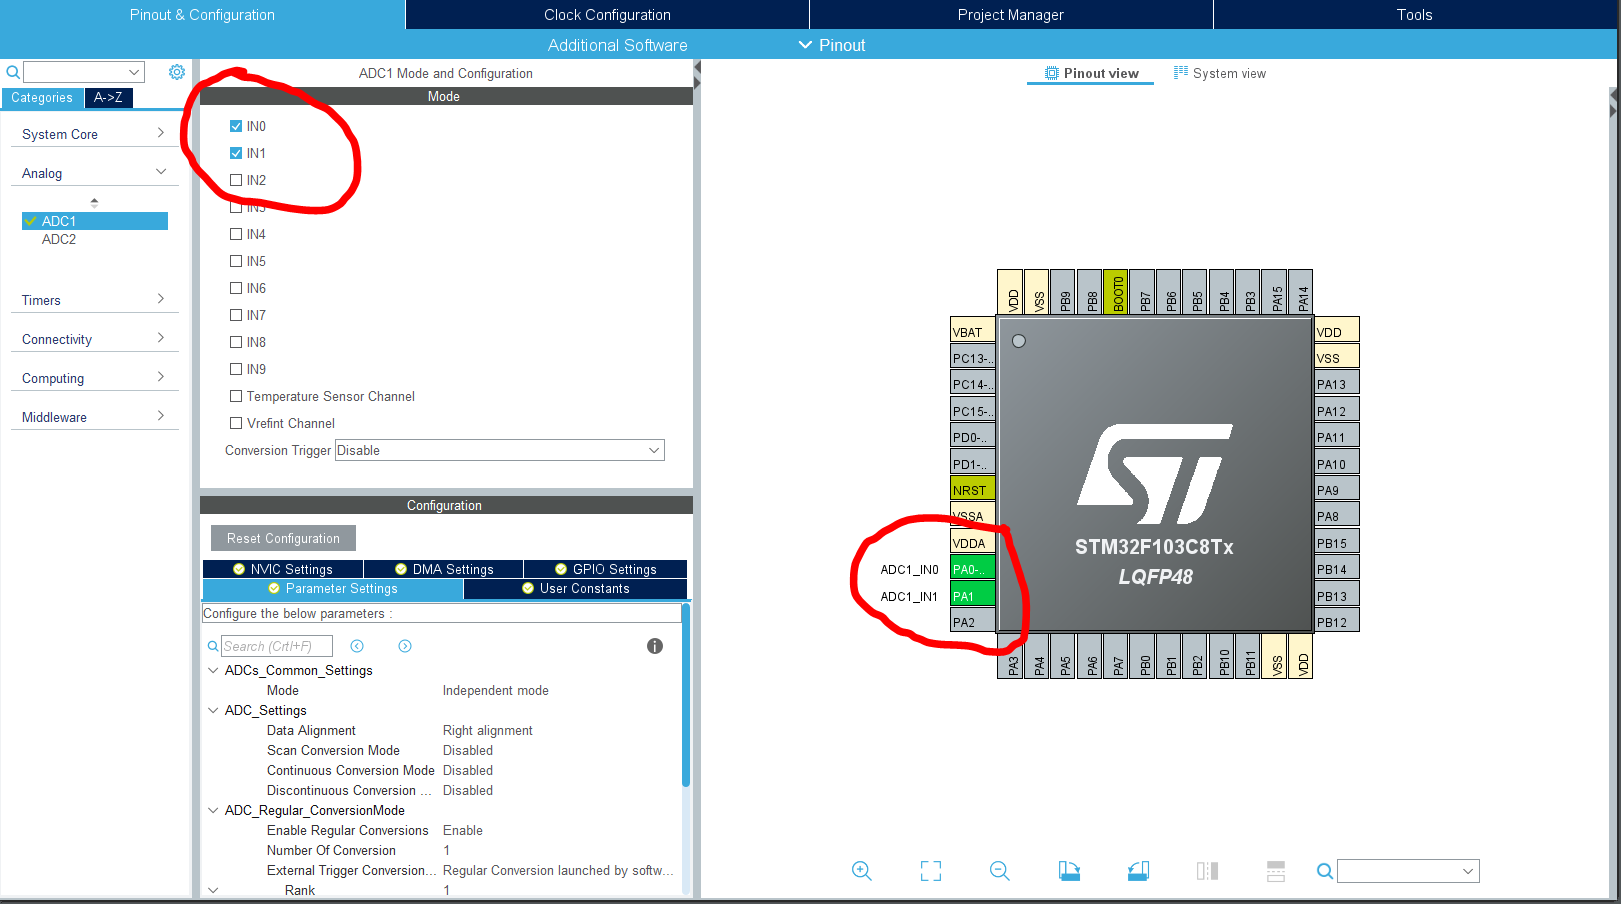
Open STM32CubeMX and create new project or open an existing project. On the categories panel on the left side select ADC1 under the Analog tab. select the channels you want to use and the corresponding pins will be highlighted.
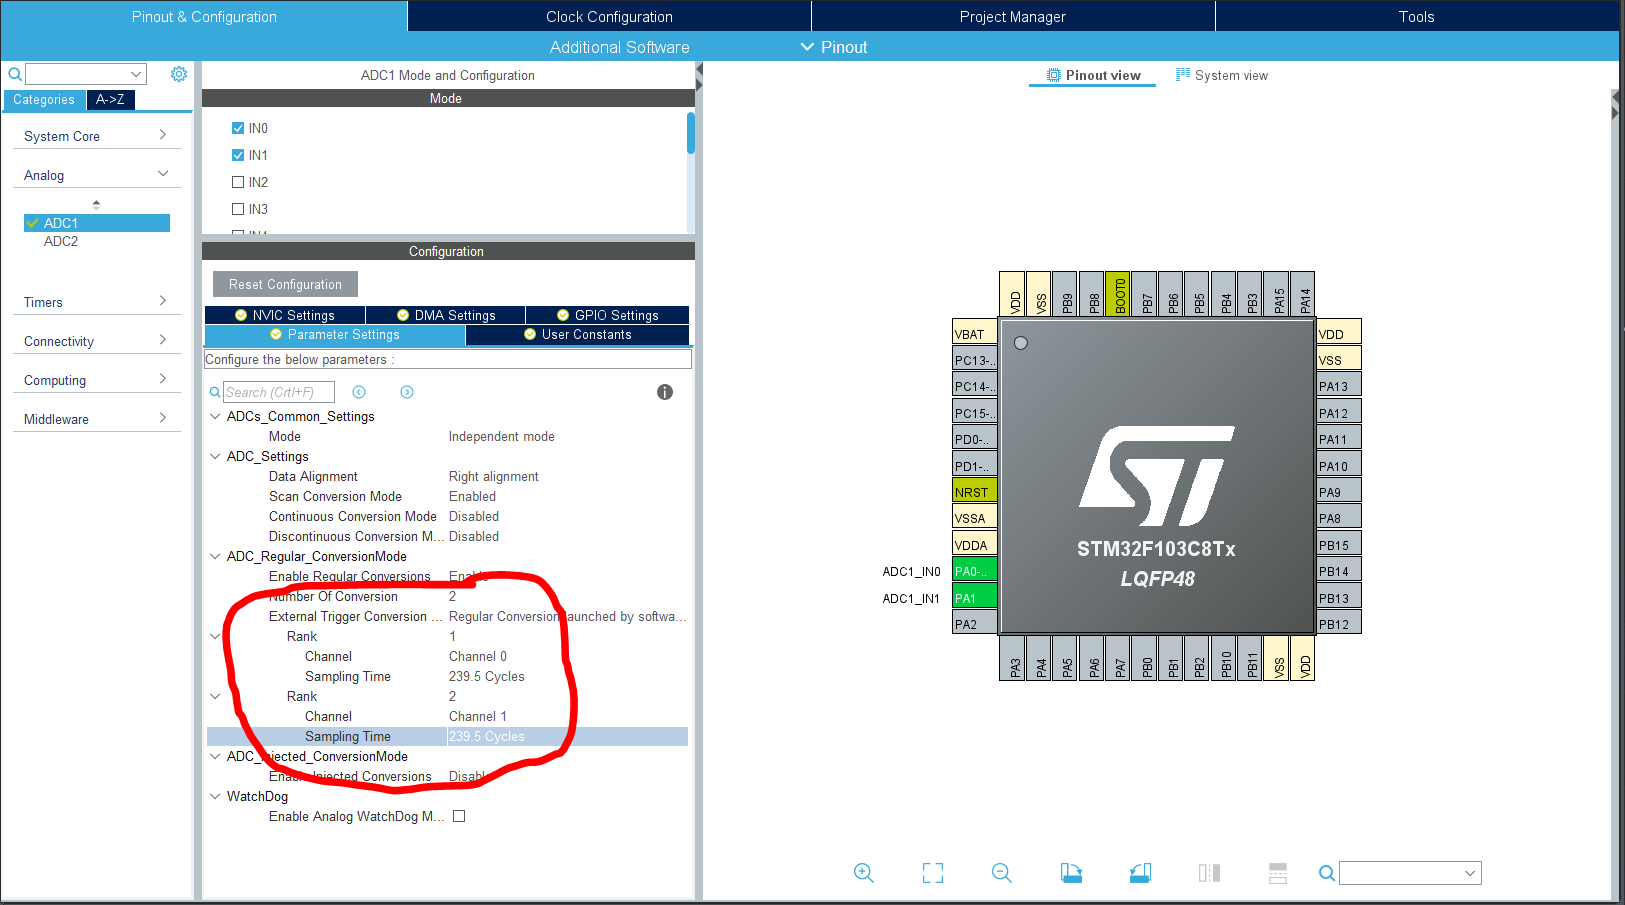
On the Number of conversions select number of active ADC channels. Each ADC channel should have a different rank. Select the ADC channel in the Channel menu under the rank dropdown. Select the sample time according to your application. I use 239.5 cycles.
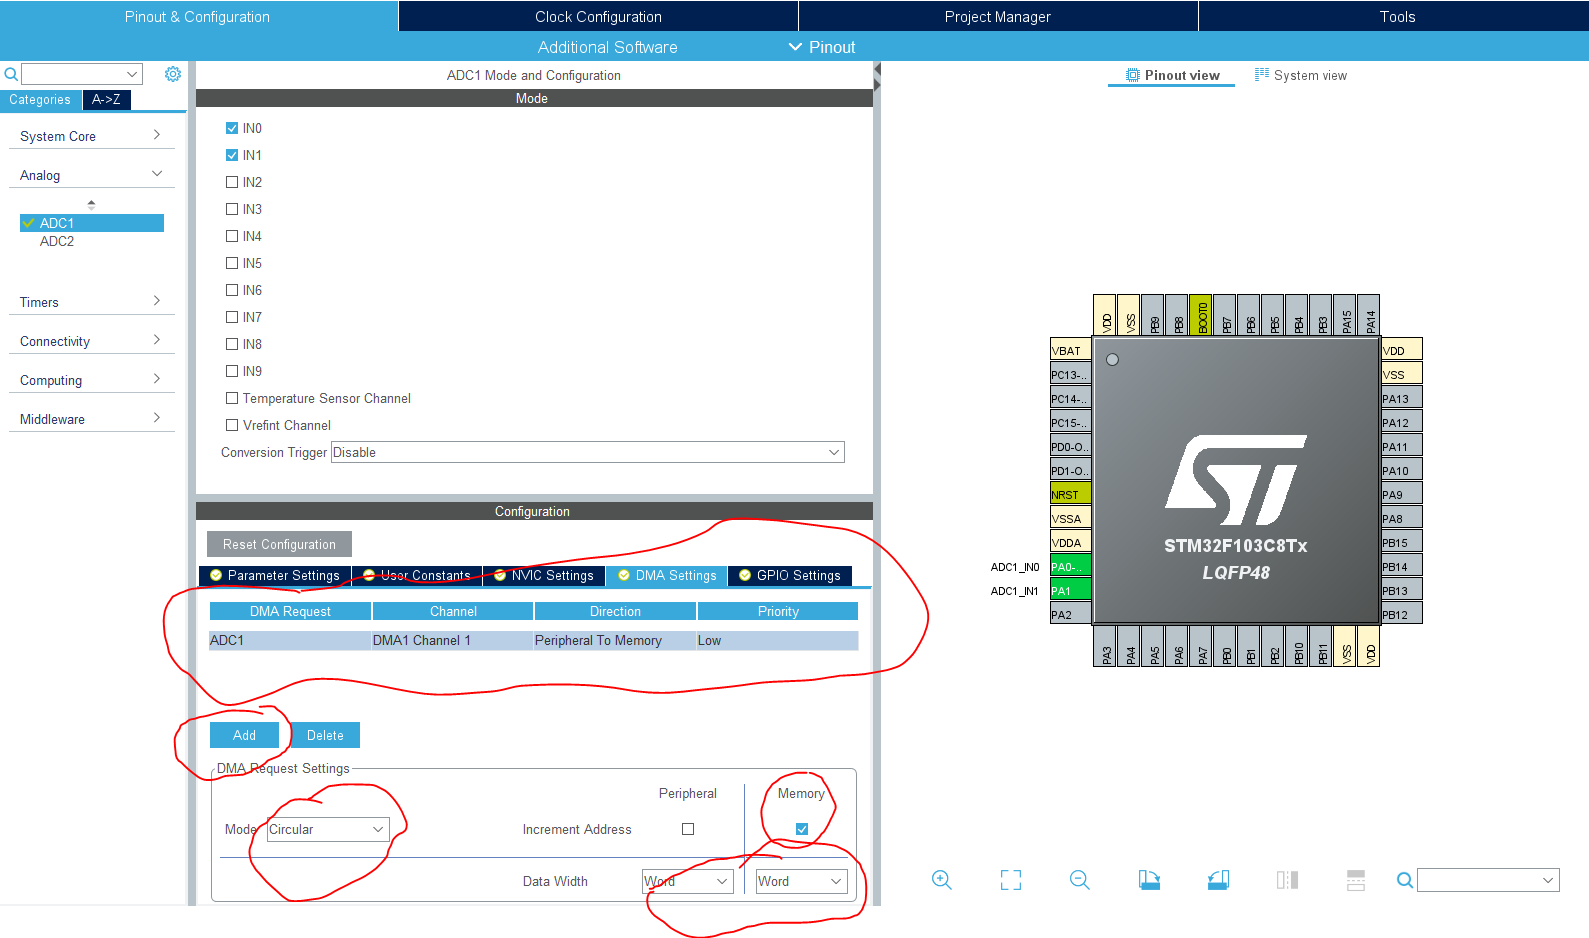
We are going to use DMA with our ADC so that we don’t have to wait for the ADC conversion to finish in our main loop. Under DMA settings click on Add and select normal under mode select circular, Data width should be word on both peripheral and in increment address memory should be checked.
After the setup is completed generate the code.
Code
In main.c file we have to do two things
- Declare 32-bit array as Global Variable to store the value
- Start the ADC conversion in DMA mode
Firstly lets declare the global variable array.
uint32_t adc_vals[2]; // we are using 2 channels so the array size of 2 next, we should start the ADC conversion by calling the HAL_ADC_Start_DMA function in the main function inside USER CODE BEGIN 2 block
  /* USER CODE BEGIN 2 */

  HAL_ADC_Start_DMA(&hadc1, adc_vals, 2);

  /* USER CODE END 2 */
You are all set, you can access the ADC values from adc_vals variable from anywhere in the program.
Although the ADC is 12bits we are using 32bit variable to store the ADC data. Since the ADC value is the maximum of 12 bits we can take the lower 16 bits of the 32bit variable and you can split it into two 8bits and send it over serial or CAN bus. See the below code snippet.
uint8_t high_byte = adc_vals[0] & 0xFF;
uint8_t low_byte = (adc_vals[0] << 8) & 0xFF;
you can see the full code here
