

This tutorial shows you how to connect Raspberry Pi to CAN bus. and PCB gerber files are included.
Hardware Components
| Part | Value | Type | Packages |
| R1,R2 | 10k | Resistor | 0805/PTH |
| R3 | 120R | Resistor | 0805/PTH |
| C1,C2 | 22pF | Capacitor | 0805/PTH |
| Y1 | 16MHz | Crystal Osc | HC49US |
| U2 | MCP2515 | IC | SO-18/DIP |
| U3 | MCP2551 | IC | SO-8/DIP |
| J1,J2 | Terminal | Connector | 5MM |
Use 0805 and SO Packages for PCB and PTH and DIP for DIY Perforated boards
Wiring Diagram

Raspberry Pi Configuration
Update and Upgrade Raspberry Pi
sudo apt-get update
sudo apt-get upgrade
once that is done proceed to edit the /boot/config.txt in the terminal enter the following command
sudo nano /boot/config.txtUncomment the following line
dtparam=spi=onAdd the following lines
dtoverlay=mcp2515-can0,oscillator=16000000,interrupt=25
dtoverlay=spi0-hw-cs
After editing save by pressing Ctrl+X followed by Enter. In the same terminal enter the following commands to install CAN bus utilities.
sudo apt-get install can-utilsAfter the above command executes successfully we have to add the below line to startup file /etc/rc.local before exit 0. This line will initialize the CAN bus interface with the given speed. In our case speed is 500Kb/s so it is 500000 bits per second
sudo ip link set can0 up type can bitrate 500000reboot your raspberry pi using the following command
sudo rebootonce the raspberry pi is rebooted run the following command in the terminal to check if the CAN bus is initialized successfully.
dmesg | grep spi0once the above command is executed you should be able to see the following response

this indicates the successful initialization of the CAN bus in Raspberry Pi. otherwise please check your wiring .
PCB
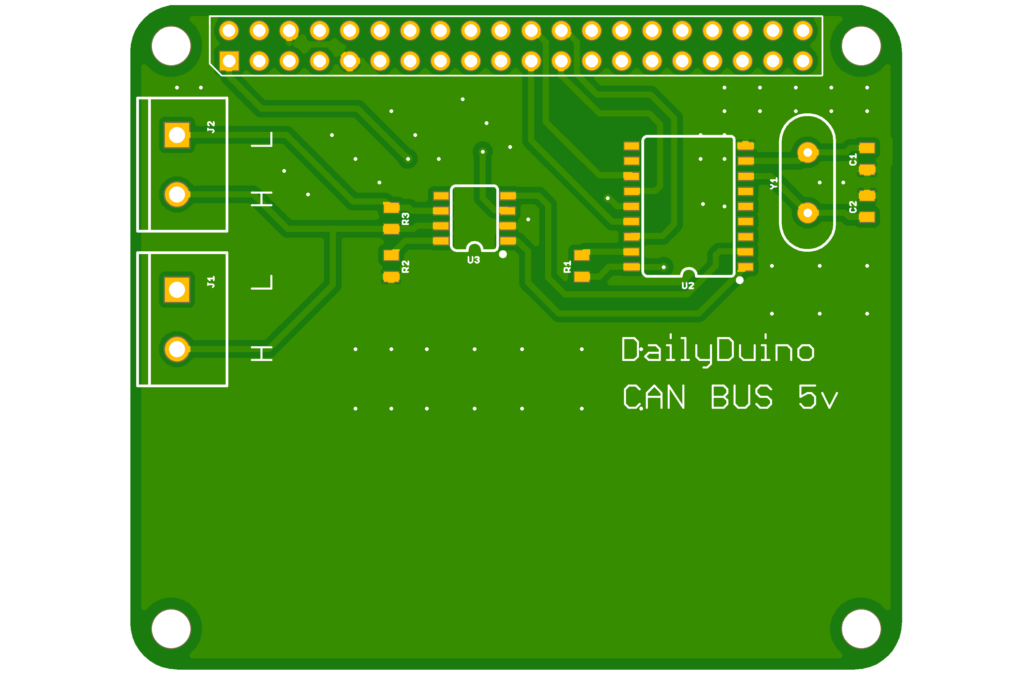
- You can Download the PCB Gerber Here
Thanks for reading 🙂
